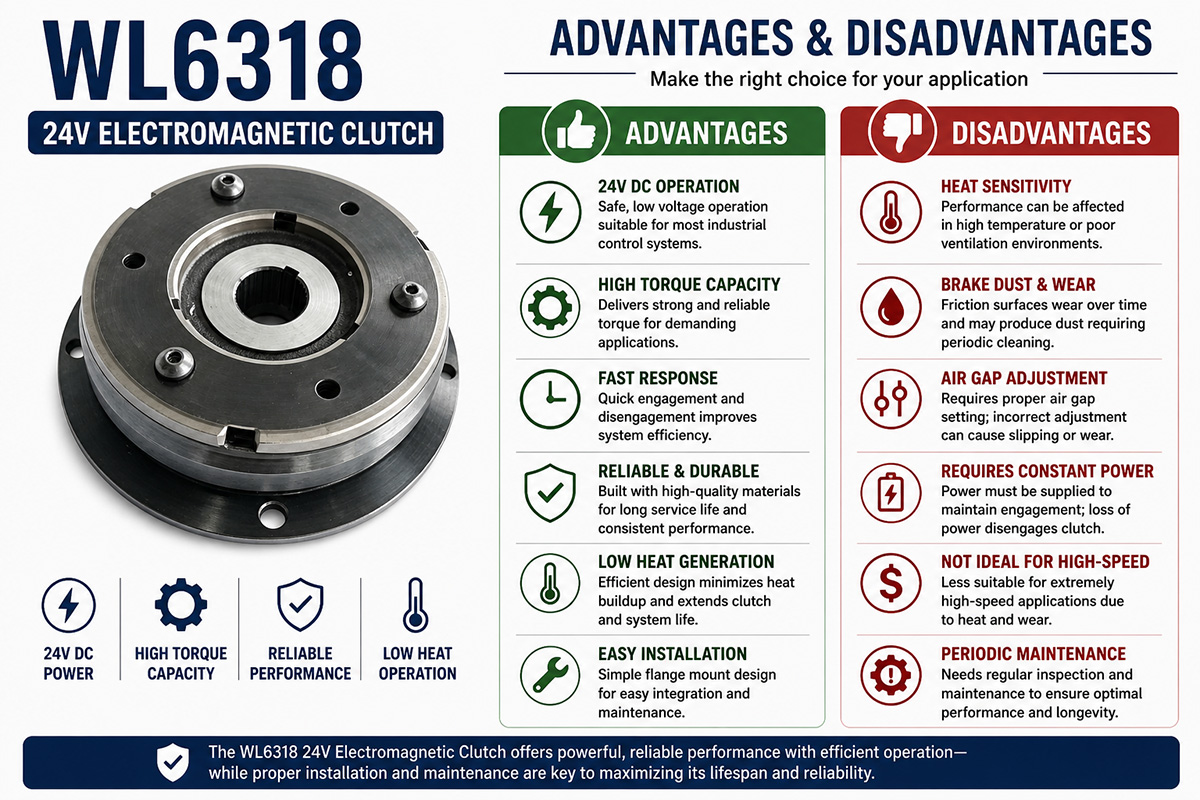
24V electromagnetic clutches provide many benefits, making them an excellent choice for industrial applications. Firstly, these devices possess high responsiveness, allowing quick engagement. They offer precise motion control, which makes it possible to use in automation systems. The 24V DC voltage ensures energy efficiency and safety. Furthermore, its compact size makes it easy to install, and low-noise operation improves the work environment. In addition, 24V electromagnetic clutches require little maintenance and have a long service life.
However, they have some limitations too. They create a lot of heat in case of frequent usage, so it is necessary to provide ventilation or cooling for the clutch. Friction materials wear over time and have to be replaced. Limited capability in transmitting torque requires the use of bigger models. Moreover, stable voltage is crucial for proper operation, and fluctuation might decrease effectiveness. Improper installation might cause decreased efficiency or premature wear-out.
Therefore, 24V electromagnetic clutches should be selected and installed carefully in order to ensure high performance.
Troubleshooting Guide of 24V Electromangetic Clutch
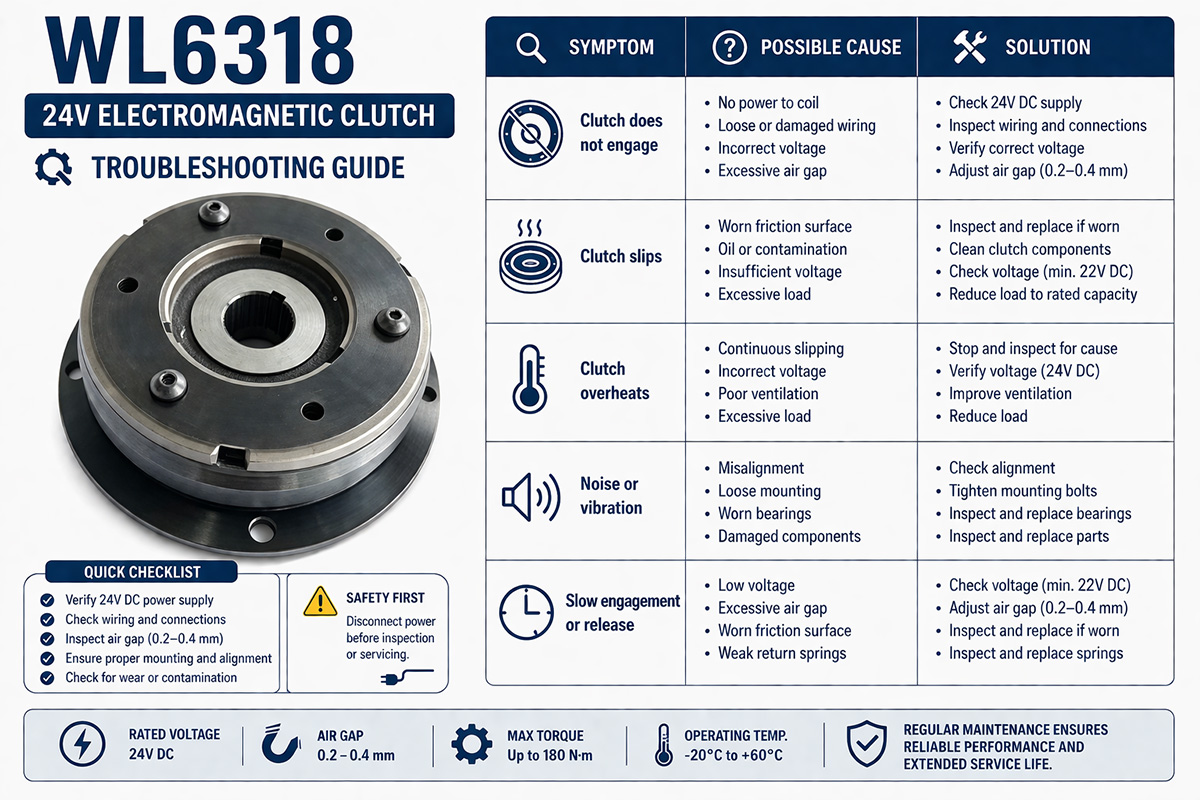
Troubleshooting electromagnetic clutches operates in 3 main areas: the electrical supply, the mechanical parts, and overheating conditions. Below is a guide on how to troubleshoot common problems.
Electrical System Troubleshooting
Most clutch problems arise from electrical faults in the coil. The coil requires an adequate 24V supply for proper functioning -2-5.
Supply Voltage Check:
Verify voltage at the clutch connector when it is supposed to be ON. Normal voltage ranges between 24V ±5% -1. Variations outside this range may cause malfunctioning, resulting in slippage -5. Connection/Ground Check: Poor or corroded grounding may prevent the engagement of the clutch. Ensure there is a continuous connection between the ground and the frame -1-7.
Perform a Continuity Test: Disconnect the clutch and use an ohmmeter to perform a continuity test.
Infinite (Open) Reading: Open internal coil connections; Replace the unit -7.
Low Reading (near 0 ohms): Shorted coil; Replace clutch.
Normal Reading (~25 ohms): Indicates that the coil is in good condition -3. 🔧 Mechanical & Physical Checks
If the power supply is normal, check the clutch for mechanical problems.
Air Gap Check: Excessive wear may lead to an excessively wide air gap. Adjust: Adjust according to manufacturer’s guidelines -10.
Inspect for Contamination: Presence of oil, grease or moisture on the friction surfaces leads to slippage -8. Clean the friction surfaces with brake cleaner if found contaminated.
Physical Inspection/Damage Check: Check for any signs of physical misalignment or damage. Ensure that the field coil is centrally mounted.
Overheating Problems 🌡️
Improper installation may lead to off-center alignment that leads to rotors striking each other, producing debris which quickly destroys the clutch -8
Though clutches are meant to generate heat in the process of operation, excess heat causes premature failure.
Normal vs. Abnormal Heat
The coil is designed for a particular temperature rise (e.g., 40°C above ambient temperature). If the clutch feels hot, chances are high of malfunction -5. Causes of overheating:
Low Voltage Supply: Excessive current flow in an attempt to start results in overheating -8.
Slippage: Inadequate engagement caused by contamination or excessive loads results in overheating
Continuous Operation: Some units require intermittent duty cycles, and their continuous use may result in overheating.
High Ambient Temperature: Ensure there is sufficient airflow. Do not place near any heat source.
💡 Preventative Maintenance Recommendations
To avoid unexpected downtime:
Keep the clutch clean regularly: Prevent dust from getting into the air gap -5.
Regularly inspect electrical connections for tightening -5-8. If needed, apply thread locking adhesive if recommended.
Air Gap Measurement: Regularly measure and adjust the armature stroke/air gap -10. If these recommendations are not helpful, then find a specific maintenance manual for your equipment. Disassembly procedures vary depending on the make and model. If you would like to share any readings/measurements, then I can help further narrow down the possible causes of your problem.